Super Bowl Dessert Peanut Butter Fudge Cups
Highlighted under: Sweet & Baked
I absolutely love watching the Super Bowl, and what makes it even better is indulging in delicious treats while cheering for my favorite team. This recipe for Super Bowl Dessert Peanut Butter Fudge Cups combines rich chocolate and creamy peanut butter in a bite-sized delight that's perfect for game day. The best part? They are incredibly easy to make and require minimal ingredients, allowing me to whip them up quickly and get back to enjoying the game with my friends.
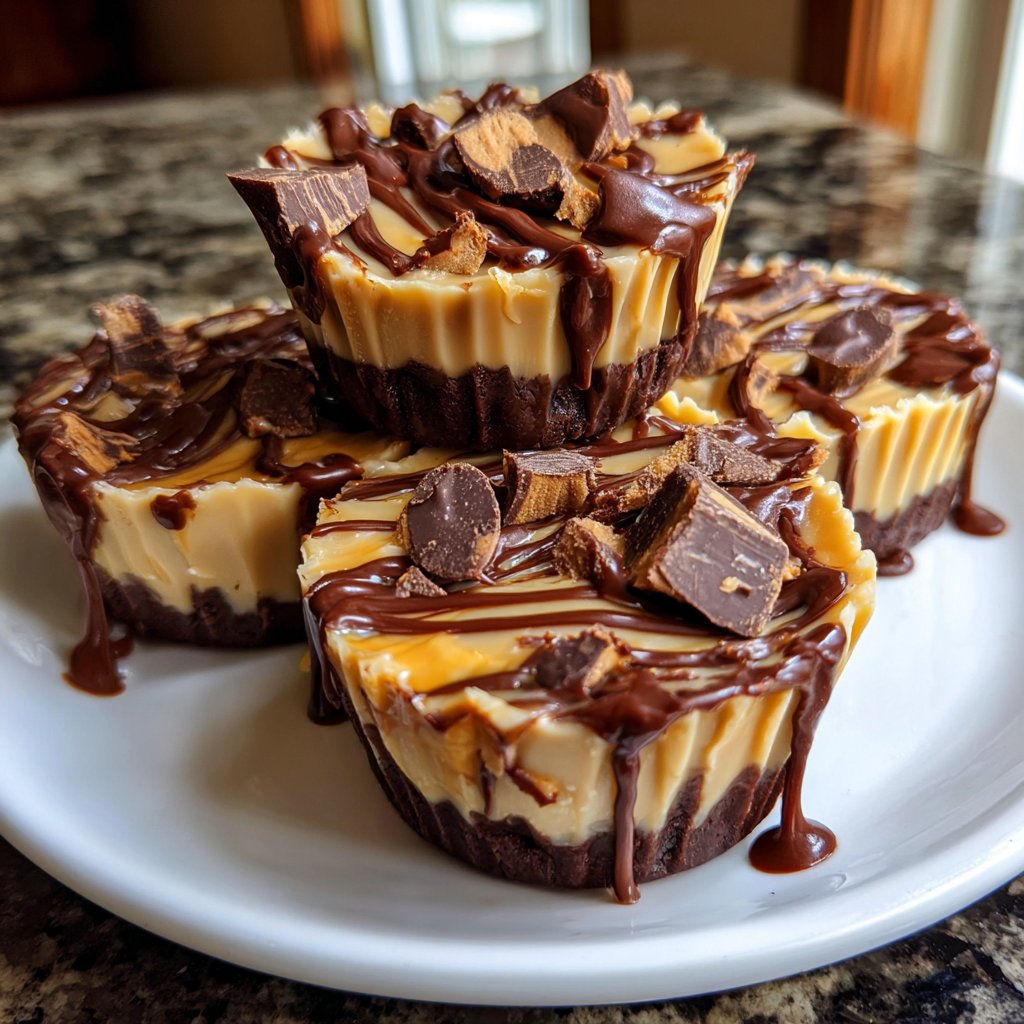
When I first made these Peanut Butter Fudge Cups for a Super Bowl party, I thought they would be a hit, but I was completely blown away by how quickly they disappeared! The combination of creamy peanut butter and smooth chocolate creates an irresistible treat that appeals to both kids and adults. One of my favorite tips is to use a good quality chocolate for the coating—it makes all the difference in flavor!
I also love how customizable these cups can be; you can easily add nuts, sea salt, or even a touch of crushed pretzels for an extra crunch. With just a simple melt-and-mix method, these no-bake treats are not just easy to make but truly a crowd-pleaser at any gathering.
Why You Will Love This Recipe
- Rich chocolate flavor paired with creamy peanut butter
- Quick and easy to make with minimal ingredients
- Perfect for parties, especially during the Super Bowl
- No-bake treat that requires no cooking time
Perfecting the Peanut Butter Filling
The peanut butter filling is the heart of these fudge cups, creating a rich and creamy texture that perfectly contrasts with the chocolate coating. Using creamy peanut butter is essential for achieving a smooth consistency that blends seamlessly with the powdered sugar and cocoa powder. If you choose to use natural peanut butter, be aware that it contains oil, which may alter the texture slightly; I recommend stirring it well before combining with other ingredients to ensure a smooth mix.
When mixing the filling, aim for a consistency that holds together yet is soft enough to spoon into the fudge cups. If the mixture feels too dry, add a teaspoon of melted coconut oil or additional peanut butter to moisten it. Conversely, if it's too runny, a bit more powdered sugar can help firm it up.
Make sure to combine all ingredients thoroughly. A hand mixer can expedite this process, but mixing by hand will allow you to gauge the texture better. Stop mixing once the mixture is uniform, as overmixing can introduce air, altering the fudgy consistency you're striving for.
Melting and Handling Chocolate
Melting chocolate might seem simple, but it's crucial for achieving that perfect glossy finish on your fudge cups. When melting milk chocolate chips, use a microwave-safe bowl and melt them in 30-second intervals, stirring each time to prevent overheating. Chocolate burns quickly, and once it does, there's no saving it! Ideal melted chocolate should appear smooth and shiny without any clumps or lumps.
If you don't have a microwave, you can easily melt chocolate on the stovetop using a double boiler. Place a heatproof bowl over a pot of simmering water (not boiling) to gently melt the chocolate, stirring continuously until fully melted. This method provides more control over the temperature and is less likely to scorch the chocolate.
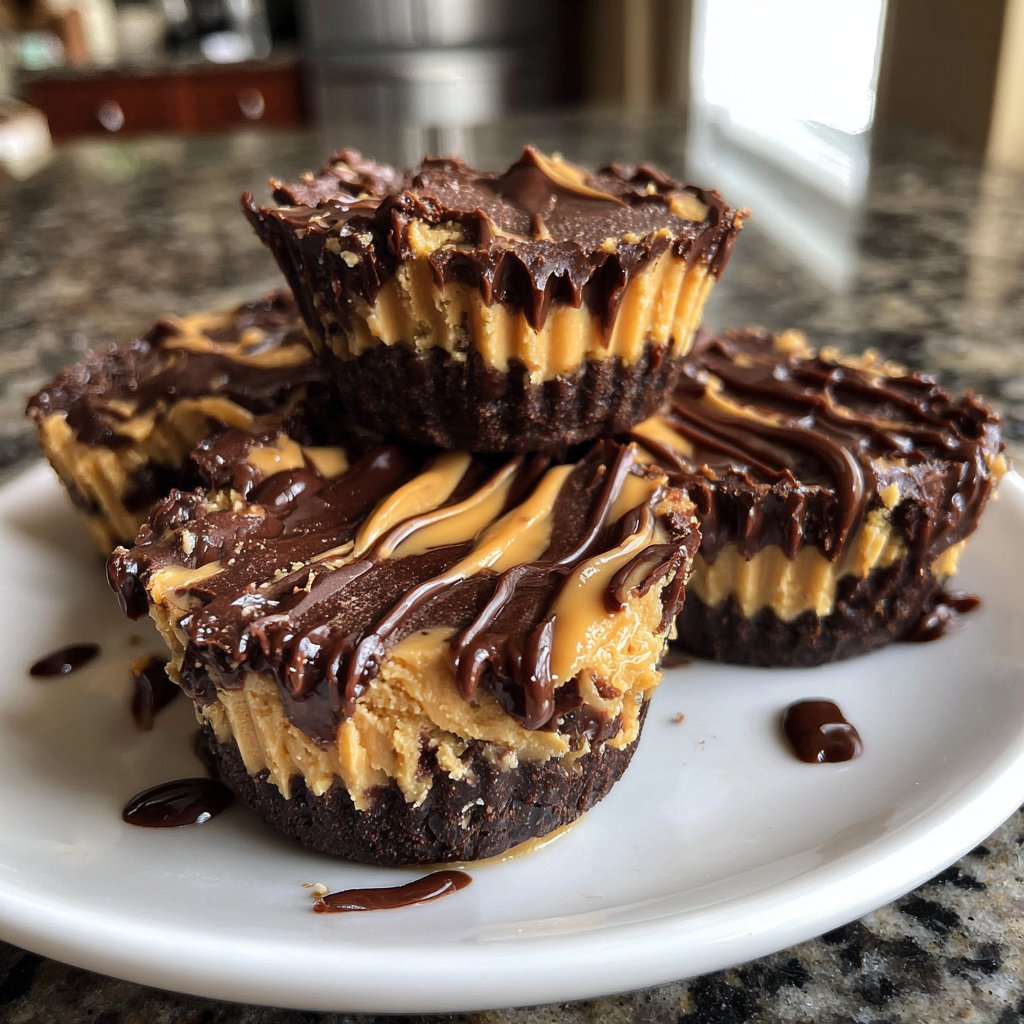
To coat the fudge cups evenly, use a small spoon or silicone brush to help layer the melted chocolate seamlessly. Aim for an even thickness to avoid overly thick edges that can result in unbalanced bites; about 1/8 inch should do the trick. Once assembled, remember to tap the cups gently on the countertop to help settle the filling and chocolate.
Serving and Storing Your Fudge Cups
These peanut butter fudge cups make for a fantastic party dessert, especially during the Super Bowl where bite-sized treats shine. For serving, you can arrange them on a platter, decorating with a sprinkle of sea salt or mini chocolate chips for a professional touch. Each cup delivers a satisfying combination of textures, so feel free to serve them alongside your favorite snacks or drinks for an indulgent experience.
If you have leftovers (which, let’s be honest, is a rarity), store these fudge cups in an airtight container in the refrigerator. They will stay fresh for about a week, maintaining their quality thanks to the chocolate coating. However, I recommend letting them sit at room temperature for 10-15 minutes before enjoying, as this will enhance the soft, creamy texture of the peanut butter filling.
For a longer-term solution, you can freeze these fudge cups. Simply place them in a single layer on a baking sheet and freeze until solid, then transfer them to a freezer-safe container. They can be stored in the freezer for up to three months. Thaw them overnight in the refrigerator before serving to retain their delightful texture.
Ingredients
Gather the following ingredients to get started:
Ingredients
- 1 cup creamy peanut butter
- 1/2 cup powdered sugar
- 1/4 cup unsweetened cocoa powder
- 1/2 teaspoon vanilla extract
- 1 cup milk chocolate chips
Make sure to measure each ingredient accurately for the best results!
Instructions
Follow these simple steps to create your fudge cups:
Mix Peanut Butter Filling
In a medium bowl, combine the creamy peanut butter, powdered sugar, cocoa powder, and vanilla extract. Stir until the mixture is smooth and well combined.
Prepare Chocolate Coating
In a microwave-safe bowl, melt the milk chocolate chips in 30-second increments, stirring between each interval until fully melted and smooth.
Assemble Fudge Cups
Spoon a small amount of melted chocolate into the bottom of each cup. Then, add a generous teaspoon of the peanut butter mixture on top. Finally, cover with more melted chocolate to seal.
Chill and Set
Place the filled cups in the refrigerator to set for at least 30 minutes, or until the chocolate hardens.
Once set, these cups are ready to be enjoyed!
Pro Tips
- For an extra touch, sprinkle some sea salt on top before the chocolate sets for a delightful salty-sweet contrast.
Customizing Your Fudge Cups
Feel free to get creative with your fudge cups! You can substitute crunchy peanut butter for the creamy version if you enjoy a bit of texture. Adding crushed pretzels or nuts into the peanut butter filling provides an exciting crunch that complements the creamy chocolate nicely.
For chocolate lovers, consider using dark chocolate chips instead of milk chocolate. This swap adds a richer, more decadent flavor profile that balances beautifully with the sweetened peanut butter. You can also experiment with flavored chocolate such as almond or peanut butter chips to infuse a unique twist.
If you want to make these fudge cups vegan, substitute the chocolate chips with dairy-free chocolate and use maple syrup in place of powdered sugar for sweetness. These alternatives will still yield a deliciously satisfying treat without compromising flavor.
Troubleshooting Common Issues
One common issue when making fudge cups is the chocolate not setting correctly. If your chocolate appears too thin after melting, it might have been overheated or has moisture mixed in. If this happens, try adding a small amount of coconut oil to help it solidify. Alternatively, ensure your mixing tools are completely dry to prevent moisture from interfering.
If the peanut butter filling is overly sticky, it likely needs a bit more powdered sugar. This can happen if the peanut butter used is too oily. Adjusting the consistency will help make it easier to scoop and mold into those perfectly shaped cups.
When assembling, if the chocolate base layer is too set before you add the filling, simply reheat it slightly to soften once more. To avoid a hard chocolate base, keep an eye on the refrigerator time; 30 minutes should suffice, but check your fudge cups periodically. They should still be malleable, allowing you to add the filling without crumbling the bottom layer.
Scaling the Recipe
This recipe can easily be scaled up for larger gatherings or scaled down if you're craving just a few pieces. Doubling the recipe requires no adjustments in technique; simply ensure you have a larger mixing bowl that can handle the increased quantities. The same cooking times for melting chocolate and chilling will apply.
For smaller batches, you can halve the ingredient measurements, but it's crucial to maintain the same ratios to achieve the right texture, flavor balance, and overall success of your fudge cups. Consider using mini muffin tins to create bite-sized versions that are perfect for smaller gatherings or as a sweet personal treat.
When scaling down, I recommend using a kitchen scale for precise measurements, especially with the cocoa powder and peanut butter. This will help you maintain consistency and avoid common pitfalls like having too much or too little filling versus chocolate. Baking is about precision, and keeping an eye on these basics leads to sweeter successes.
Questions About Recipes
→ Can I use dark chocolate instead?
Yes, dark chocolate can be used for a richer flavor.
→ How long do these fudge cups last?
They can be stored in an airtight container in the refrigerator for up to a week.
→ Can I freeze these fudge cups?
Absolutely! They freeze well and can last for up to three months. Just make sure to thaw them in the fridge before serving.
→ What can I use instead of powdered sugar?
If you need a substitute, you can use coconut sugar or a sugar alternative, but the texture may vary.
Super Bowl Dessert Peanut Butter Fudge Cups
What You'll Need
Ingredients
- 1 cup creamy peanut butter
- 1/2 cup powdered sugar
- 1/4 cup unsweetened cocoa powder
- 1/2 teaspoon vanilla extract
- 1 cup milk chocolate chips
How-To Steps
In a medium bowl, combine the creamy peanut butter, powdered sugar, cocoa powder, and vanilla extract. Stir until the mixture is smooth and well combined.
In a microwave-safe bowl, melt the milk chocolate chips in 30-second increments, stirring between each interval until fully melted and smooth.
Spoon a small amount of melted chocolate into the bottom of each cup. Then, add a generous teaspoon of the peanut butter mixture on top. Finally, cover with more melted chocolate to seal.
Place the filled cups in the refrigerator to set for at least 30 minutes, or until the chocolate hardens.
Extra Tips
- For an extra touch, sprinkle some sea salt on top before the chocolate sets for a delightful salty-sweet contrast.
Nutritional Breakdown (Per Serving)
- Calories: 200 kcal
- Total Fat: 14g
- Saturated Fat: 6g
- Cholesterol: 0mg
- Sodium: 50mg
- Total Carbohydrates: 19g
- Dietary Fiber: 1g
- Sugars: 14g
- Protein: 4g