Homemade Peanut Butter Cups Vegan Style
Highlighted under: Sweet & Baked
I absolutely love making these Homemade Peanut Butter Cups Vegan Style because they allow me to indulge my sweet tooth without any guilt. The combination of rich chocolate and creamy peanut butter is simply irresistible! I enjoy crafting these treats for friends and family, and they always impress with their taste and texture. Plus, they’re quick to prepare, making them a delightful snack or dessert option that’s sure to satisfy any craving without compromising on health.
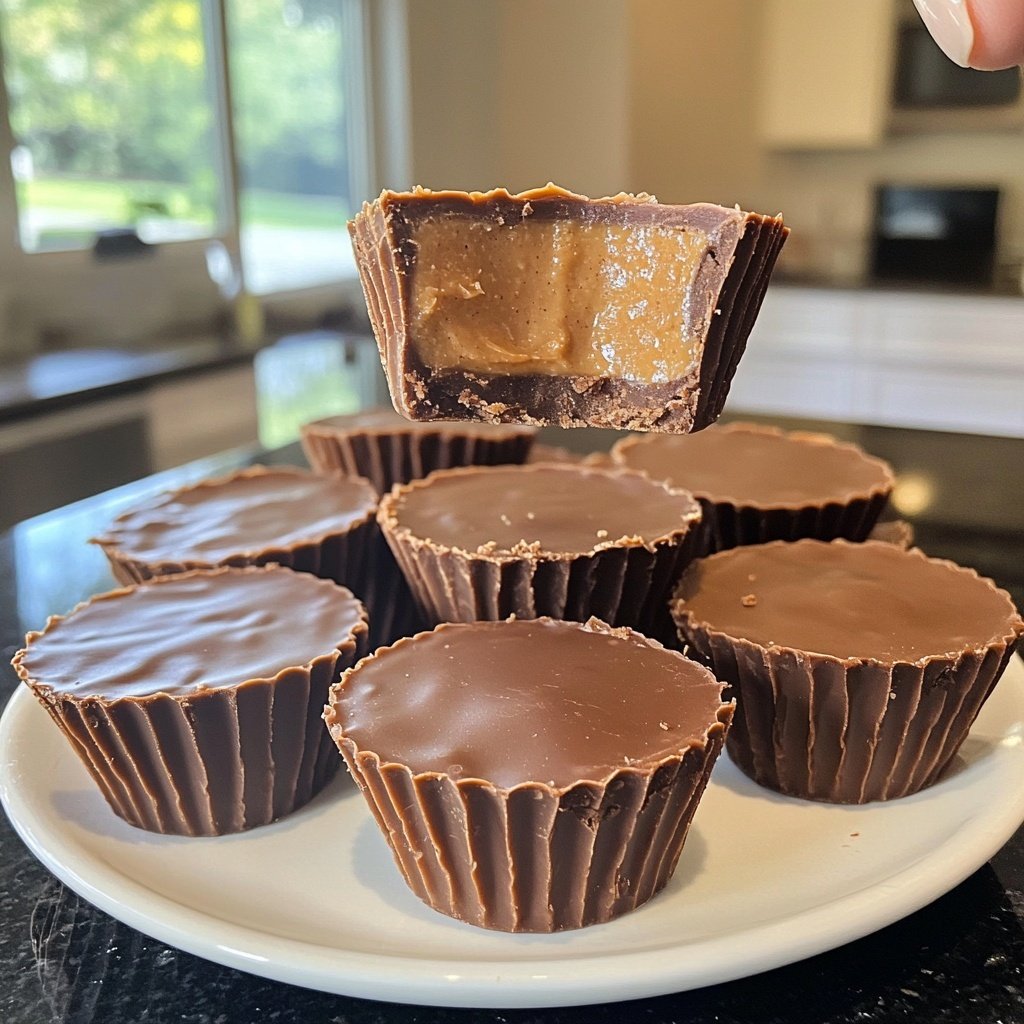
When I first attempted to make vegan peanut butter cups, I was amazed at how simple yet rewarding the process was. Using high-quality dark chocolate and natural peanut butter, the flavors meld beautifully, creating a treat that feels indulgent without the dairy. The method I found works best combines melting the chocolate and then layering it with the nutty filling, ensuring each cup has that perfect balance of chocolate and peanut butter in every bite.
I learned the importance of letting the chocolate cool slightly before pouring it into the molds to allow the filling to set without melting away. This small detail dramatically improves the final product, making them look and taste professionally made. Plus, they're a fantastic option for satisfying chocolate cravings on a vegan diet!
Why You Will Love This Recipe
- Rich chocolate flavor paired with creamy peanut butter
- Simple and quick to make with minimal ingredients
- Great for sharing during gatherings or as a snack
Creating the Perfect Chocolate Layer
When melting the dark chocolate chips, it's crucial to do so in short bursts to avoid overheating and burning the chocolate. Stirring in between each increment not only ensures even melting but helps to maintain the smooth texture we desire. You’ll know it’s ready when the chocolate becomes glossy and completely melted, which usually takes about 1 to 2 minutes total in the microwave.
If you don’t have a microwave, you can use the double boiler method. Place a heatproof bowl over a pot of simmering water, making sure the bowl doesn't touch the water. Stir the chocolate until it’s melted and smooth. This method is slower but allows for more control, ensuring perfect chocolate every time.
Perfecting the Peanut Butter Filling
The combination of natural peanut butter, maple syrup, and vanilla extract creates a flavorful filling that perfectly complements the chocolate. Choosing natural peanut butter is essential here, as it contains no added sugars or hydrogenated oils, resulting in a creamier texture for the filling. If you're looking for an alternative, almond or cashew butter works beautifully as well!
To achieve a smooth filling, make sure to mix thoroughly until there are no clumps remaining. If the mixture feels too stiff to spoon easily, you can warm it slightly in the microwave for about 10-15 seconds. This will make it more pourable, allowing you to fill the cups effortlessly.
Storage and Serving Suggestions
Once the peanut butter cups have set, you can store them in an airtight container in the refrigerator for up to two weeks. This helps maintain their firmness and flavor. If you want to keep them for longer, consider freezing them. Just be sure to separate layers with parchment paper to prevent sticking, and they can last up to two months in the freezer.
These homemade peanut butter cups are wonderful on their own, but you can also get creative with toppings or variations. Consider sprinkling a little sea salt over the chocolate before it sets for an enhanced flavor contrast, or mix in crushed nuts or coconut into the peanut butter filling for extra texture!
Ingredients
For the Peanut Butter Cups
- 1 cup dark chocolate chips (vegan)
- 1/2 cup natural peanut butter
- 2 tablespoons maple syrup
- 1 teaspoon vanilla extract
- A pinch of salt
Instructions
Melt the Chocolate
In a microwave-safe bowl, melt the dark chocolate chips in 30-second increments, stirring in between, until completely smooth.
Prepare the Muffin Tin
Line a muffin tin with cupcake liners to prevent sticking. Pour a thin layer of melted chocolate into each liner, enough to cover the bottom.
Mix the Filling
In a bowl, combine the peanut butter, maple syrup, vanilla extract, and a pinch of salt until well mixed. Spoon a dollop of this mixture into each chocolate-lined cup.
Cover with Chocolate
Top each peanut butter dollop with the remaining melted chocolate, ensuring it's fully covered. Tap the muffin tin gently on the counter to remove any air bubbles.
Chill and Set
Refrigerate the cups for at least 30 minutes or until they are fully set. Once firm, you can store them in an airtight container in the fridge.
Pro Tips
- For an extra crunch, try mixing chopped nuts into the peanut butter filling before layering it into the cups.
Troubleshooting Common Issues
If your chocolate isn't melting smoothly, it might be overheating. Remove it from the microwave or heat source and stir until it becomes smooth. If you happen to get some water in the chocolate, it can seize up; if this happens, add a teaspoon of vegetable oil while stirring to rescue it.
When filling the chocolate-lined cups, a common issue can be overflow or uneven distribution. To avoid this, use a spoon or a piping bag for more precision when adding the peanut butter filling. This ensures each cup has an equal amount and keeps the chocolate layer intact.
Adjusting Portions for Different Needs
If you’re looking to make a smaller batch or need to scale up for a party, this recipe is quite flexible. You can easily halve the ingredients for a smaller treat or double them for a larger batch. Just be mindful of adjusting the size of your muffin tin accordingly, as larger cups will take longer to set.
For those who prefer different flavors, feel free to experiment with the chocolate type; using white or milk chocolate (check for vegan options) can give you a different taste profile. Additionally, adding a splash of espresso or a pinch of cinnamon to the filling can elevate the flavor even more.
Questions About Recipes
→ Can I use milk chocolate instead of dark chocolate?
Yes, but make sure to choose a vegan milk chocolate to keep the recipe plant-based.
→ How long do these peanut butter cups last?
They can last up to two weeks in the refrigerator if stored in an airtight container.
→ Can I use almond butter instead of peanut butter?
Absolutely! Almond butter will give a different flavor but works perfectly in this recipe.
→ Is it possible to sweeten them less?
Yes, you can adjust the amount of maple syrup according to your preference or use a sugar substitute.
Homemade Peanut Butter Cups Vegan Style
Created by: Josie Lambert
Recipe Type: Sweet & Baked
Skill Level: Intermediate
Final Quantity: 12 cups
What You'll Need
For the Peanut Butter Cups
- 1 cup dark chocolate chips (vegan)
- 1/2 cup natural peanut butter
- 2 tablespoons maple syrup
- 1 teaspoon vanilla extract
- A pinch of salt
How-To Steps
In a microwave-safe bowl, melt the dark chocolate chips in 30-second increments, stirring in between, until completely smooth.
Line a muffin tin with cupcake liners to prevent sticking. Pour a thin layer of melted chocolate into each liner, enough to cover the bottom.
In a bowl, combine the peanut butter, maple syrup, vanilla extract, and a pinch of salt until well mixed. Spoon a dollop of this mixture into each chocolate-lined cup.
Top each peanut butter dollop with the remaining melted chocolate, ensuring it's fully covered. Tap the muffin tin gently on the counter to remove any air bubbles.
Refrigerate the cups for at least 30 minutes or until they are fully set. Once firm, you can store them in an airtight container in the fridge.
Extra Tips
- For an extra crunch, try mixing chopped nuts into the peanut butter filling before layering it into the cups.
Nutritional Breakdown (Per Serving)
- Calories: 180 kcal
- Total Fat: 13g
- Saturated Fat: 3g
- Cholesterol: 0mg
- Sodium: 20mg
- Total Carbohydrates: 15g
- Dietary Fiber: 2g
- Sugars: 8g
- Protein: 3g