Homemade Peanut Butter Cups Vegan Style
Highlighted under: Sweet & Baked
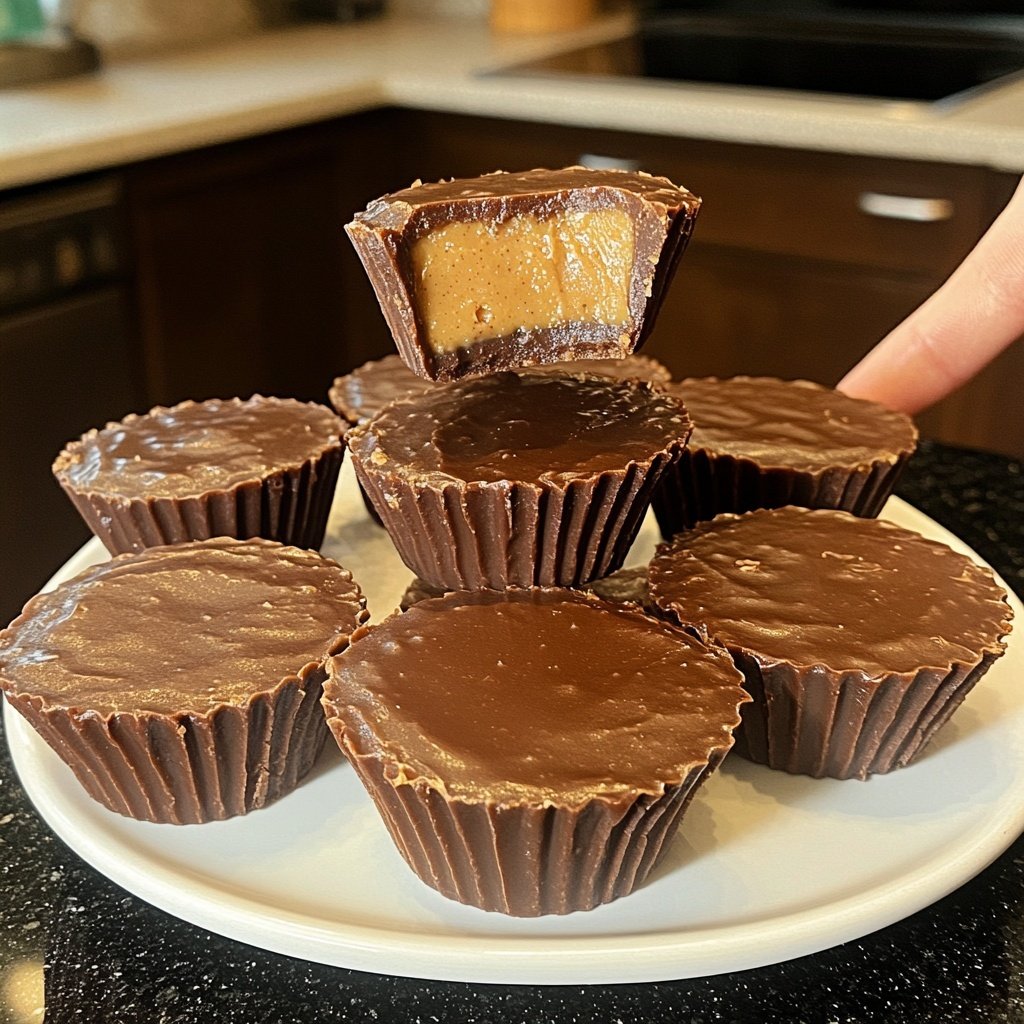
I absolutely love making these vegan peanut butter cups at home. Not only is the process incredibly simple, but I can customize them according to my cravings. Whenever I'm in the mood for a sweet snack, whipping up these cups has become my go-to treat. The combination of creamy peanut butter and rich dark chocolate is a match made in heaven. Plus, knowing they’re made with wholesome ingredients makes them that much more satisfying!
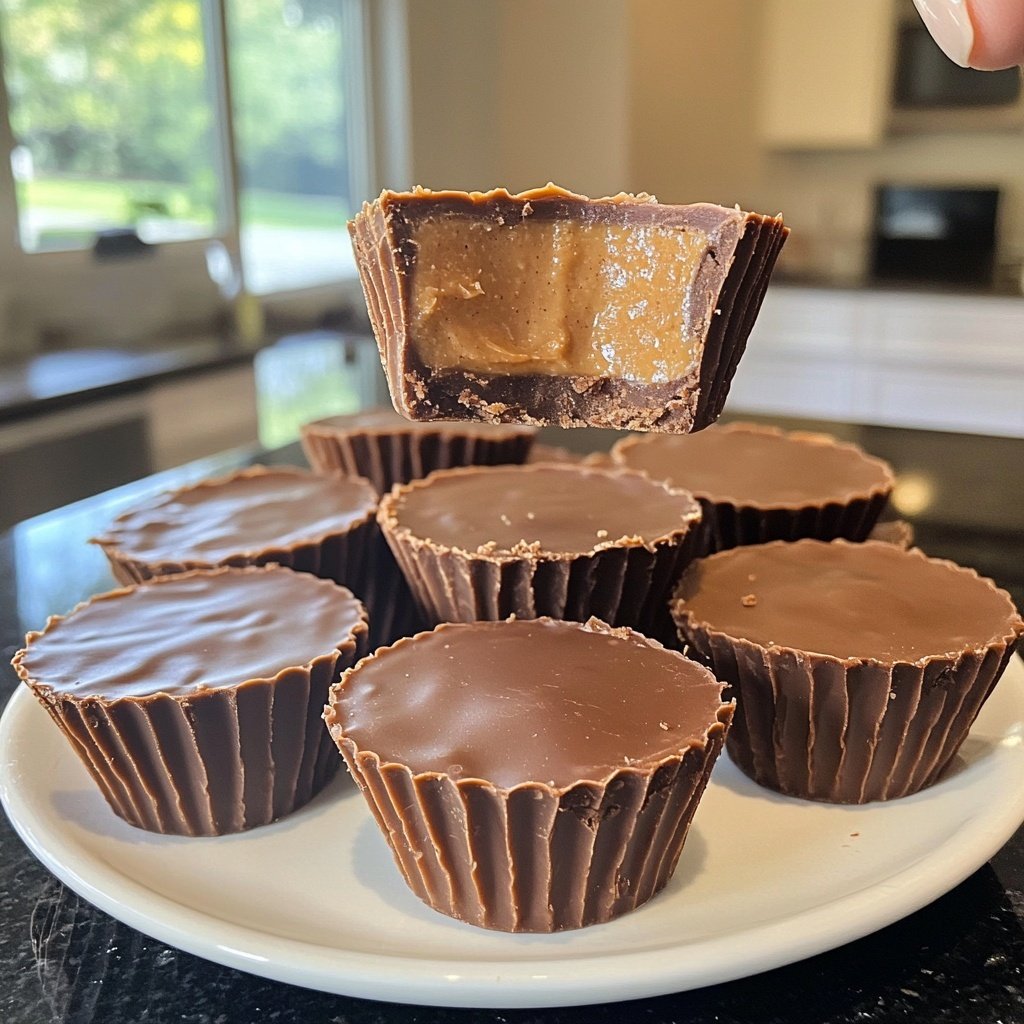
When I first decided to make these peanut butter cups, I was skeptical about how they would turn out. However, after experimenting with different chocolate brands and nut butter types, I found the perfect balance. The secret lies in using high-quality dark chocolate, which gives a rich flavor that beautifully complements the creamy peanut filling.
One key tip I learned is to let the chocolate cool slightly before dipping, as it helps create a smoother outer layer. This small adjustment made a significant difference in the texture and appearance of my cups!
Why You'll Love This Recipe
- Rich chocolate flavor paired with creamy peanut butter
- Easy to make in just 20 minutes
- Perfect for vegan and non-vegan chocolate lovers
Understanding the Ingredients
The key ingredient in these vegan peanut butter cups is the dark chocolate. Choosing high-quality dark chocolate chips ensures a rich flavor that perfectly complements the sweetness of the peanut butter. Look for chocolate with at least 70% cocoa for a robust taste. If you're sensitive to sugar, consider using unsweetened chocolate and adjusting the sweetness in your filling to match your preference.
Peanut butter is another star of this recipe; its creaminess and flavor make it the ideal filling. For a different texture, try using crunchy peanut butter. This addition will provide a delightful contrast against the smooth chocolate. If you need a nut-free option, sunflower seed butter can be a great alternative; it will yield a slightly different flavor but still deliver that creamy satisfaction.
Perfecting Your Technique
When melting chocolate, be patient and vigilant. Microwaving in 30-second intervals allows for better control over the melting process and prevents burning. Stirring frequently is essential; you want the mixture to be glossy and completely smooth before using. If the chocolate seizes or becomes thick, a tiny splash of coconut oil can help restore its consistency.
While adding the peanut butter filling, make sure the chocolate has thickened but isn’t fully hardened. This provides a sticky surface for the peanut butter to adhere to. When covering the filling with chocolate, a smooth layer is crucial to ensure that your cups hold together well. Use a spoon to spread the chocolate evenly to avoid any pockets of air that can lead to breakage.
Storage and Variations
Once your peanut butter cups are set, store them in an airtight container in the refrigerator for up to two weeks. They also freeze well, allowing you to enjoy them later. For longer storage, layer them between parchment paper and freeze in a container. This method prevents them from sticking together and ensures easy access whenever a sweet craving strikes.
Feel free to experiment with flavors! You can infuse your peanut butter with spices like cinnamon or nutmeg or add a sprinkle of sea salt on top of the chocolate for a sophisticated touch. For a festive twist, try incorporating peppermint extract into the chocolate. These variations can elevate the classic recipe and suit different taste preferences, making them even more delightful!
Ingredients
Ingredients
For the Cups
- 1 cup dark chocolate chips (vegan)
- 1/2 cup peanut butter (creamy or crunchy)
- 2 tablespoons maple syrup
- 1/2 teaspoon vanilla extract
- Pinch of sea salt
Instructions
Instructions
Melt the Chocolate
In a microwave-safe bowl, melt the dark chocolate chips in the microwave in 30-second intervals, stirring in between until smooth.
Prepare the Muffin Tin
Line a muffin tin with cupcake liners. Pour a small amount of melted chocolate into the bottom of each liner, just enough to cover the base.
Make the Filling
In a separate bowl, mix the peanut butter, maple syrup, vanilla extract, and sea salt until well combined.
Add the Filling
Once the chocolate in the muffin tin has slightly hardened, add a spoonful of the peanut butter mixture on top of the chocolate in each liner.
Top with Chocolate
Cover the peanut butter filling with the remaining melted chocolate, ensuring it is completely sealed.
Chill
Place the muffin tin in the refrigerator for at least 10 minutes to allow the chocolate to harden.
Enjoy
Once set, carefully peel the paper away and enjoy your homemade vegan peanut butter cups!
Pro Tips
- For an extra touch, feel free to sprinkle some chopped nuts or sea salt on top before the chocolate hardens.
Scaling the Recipe
This recipe is easily scalable, whether you're preparing a small treat for yourself or a larger batch for a gathering. Simply multiply the ingredients by the number of servings you want. If you're making a larger quantity, consider using a standard baking pan instead of a muffin tin for easier assembly. Just remember to adjust the chilling time, as larger cups may take longer to set.
For those who want to share these with friends and family, consider packaging them in decorative boxes or jars. Homemade treats are always a hit, and presenting them nicely makes them even more special. Just be sure to allow the cups to cool completely before packaging to avoid condensation.
Troubleshooting Common Problems
If your chocolate is not melting smoothly, it may be due to excess moisture or the heat being too high. Use a microwave-safe bowl and ensure it's completely dry. If you find your final product too sweet, consider reducing the maple syrup in the peanut butter mixture next time. A pinch more sea salt can help balance the sweetness as well.
For those whose peanut butter cups seem too soft, make sure the chocolate layer is thick enough and completely sealed around the edges. A thinner layer can result in a softer texture. If you experience difficulty removing the papers, consider refrigerating the cups for a few more minutes or lightly running a knife around the edges to separate them from the liners.
Questions About Recipes
→ Can I use almond butter instead of peanut butter?
Yes, almond butter works well for a different flavor profile!
→ How do I store these peanut butter cups?
Store them in an airtight container in the refrigerator for up to a week.
→ Can I use milk chocolate instead of dark chocolate?
Yes, but it won’t be vegan; choose a vegan milk chocolate if desired.
→ What type of chocolate is best for melting?
High-quality dark chocolate chips work best as they melt smoothly.
Homemade Peanut Butter Cups Vegan Style
What You'll Need
For the Cups
- 1 cup dark chocolate chips (vegan)
- 1/2 cup peanut butter (creamy or crunchy)
- 2 tablespoons maple syrup
- 1/2 teaspoon vanilla extract
- Pinch of sea salt
How-To Steps
In a microwave-safe bowl, melt the dark chocolate chips in the microwave in 30-second intervals, stirring in between until smooth.
Line a muffin tin with cupcake liners. Pour a small amount of melted chocolate into the bottom of each liner, just enough to cover the base.
In a separate bowl, mix the peanut butter, maple syrup, vanilla extract, and sea salt until well combined.
Once the chocolate in the muffin tin has slightly hardened, add a spoonful of the peanut butter mixture on top of the chocolate in each liner.
Cover the peanut butter filling with the remaining melted chocolate, ensuring it is completely sealed.
Place the muffin tin in the refrigerator for at least 10 minutes to allow the chocolate to harden.
Once set, carefully peel the paper away and enjoy your homemade vegan peanut butter cups!
Extra Tips
- For an extra touch, feel free to sprinkle some chopped nuts or sea salt on top before the chocolate hardens.
Nutritional Breakdown (Per Serving)
- Calories: 200 kcal
- Total Fat: 15g
- Saturated Fat: 5g
- Cholesterol: 0mg
- Sodium: 50mg
- Total Carbohydrates: 16g
- Dietary Fiber: 2g
- Sugars: 8g
- Protein: 4g