Homemade Yogurt Bites
Highlighted under: Healthy Flavor Creations
I love making these Homemade Yogurt Bites as a nutritious snack for both myself and my family. They’re not only deliciously creamy but also offer a burst of flavor that makes them absolutely irresistible. The best part is how easy they are to whip up! You can customize them with your favorite fruits or toppings, which adds a personal touch. Preparing these bites keeps me engaged in the kitchen, ensuring I provide wholesome snacks perfect for any time of the day.
When I first tried making these Homemade Yogurt Bites, I was amazed by how simple and rewarding it is. I could control the sweetness and mix in fruits that my family loves. For example, adding fresh strawberries or a drizzle of honey takes these bites to the next level. I also discovered that freezing them for a bit gives them an extra delightfully cold treat, especially during warmer days!
I've experimented with various flavor combinations, including adding a hint of vanilla or a sprinkle of cinnamon to the yogurt mixture. Each time, I feel like I’m creating something new that everyone enjoys. They’ve become a staple in our household, and I can confidently say they are well-loved!
Why You'll Love These Homemade Yogurt Bites
- Creamy and refreshing with every bite
- Customizable with your favorite fruits or nuts
- A healthy alternative to store-bought snacks
Choosing Your Ingredients Wisely
When making Homemade Yogurt Bites, choosing high-quality yogurt is essential for achieving a creamy texture. Opt for whole milk yogurt if you want a richer base, as it will enhance the creaminess of the bites. For a lower-fat option, Greek yogurt has a thick consistency and high protein content, making it an excellent base that holds well during freezing. Always check for live active cultures, as these contribute to the yogurt's tangy flavor and creamy profile.
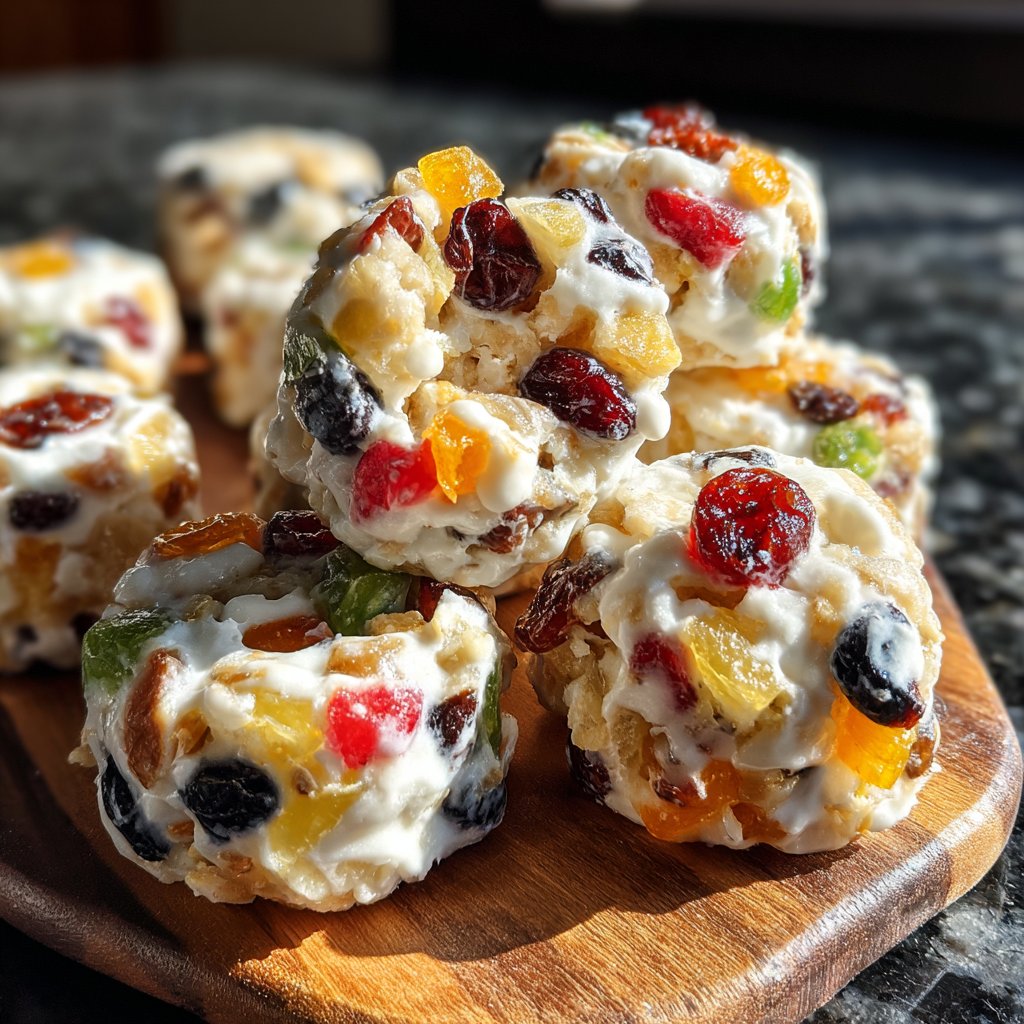
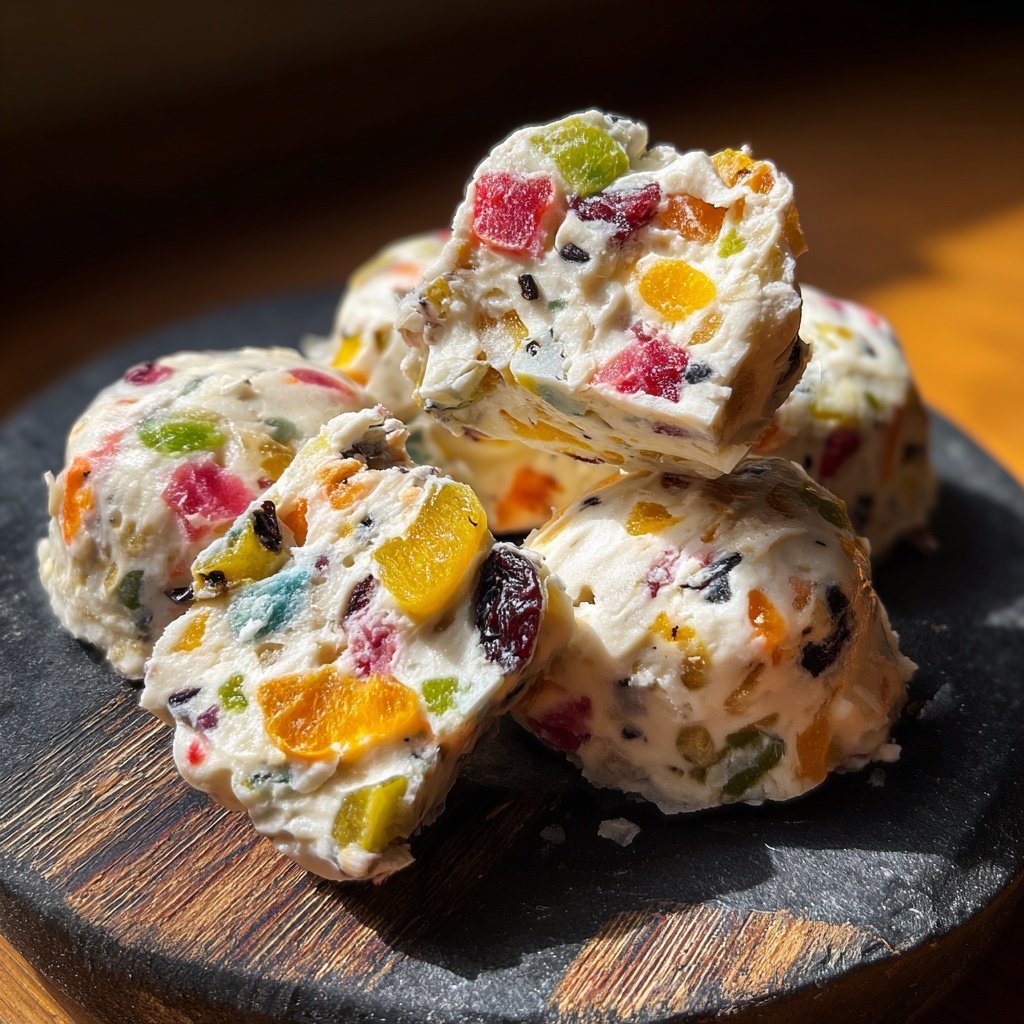
Fruits play a vital role in flavor and texture. Berries, such as strawberries, blueberries, or raspberries, blend beautifully with the yogurt, adding vibrant colors and natural sweetness. If you prefer tropical flavors, consider using mango or pineapple, but remember to chop these fruits into smaller pieces to ensure even distribution throughout the yogurt mixture. Avoid using overly watery fruits, like watermelon, as they can make the yogurt bites icy rather than creamy.
Tips for Perfect Freezing
Filling the molds up to three-quarters full is crucial; this ensures the yogurt bites have enough space to expand as they freeze without overflowing. It's also a good idea to gently tap the molds on the counter to eliminate any air bubbles, which can create pockets of ice in the bites and affect the texture. For a fun twist, layer different fruit mixes for visually appealing bites – just ensure each layer is frozen before adding the next.
After the yogurt bites have been frozen for at least four hours, check their firmness by gently pressing the surface with your finger. If it holds its shape and feels solid, they're ready to be removed from the molds. If the bites aren't as firm as you'd like, return them to the freezer for an additional hour. For hassle-free storage, consider using a vacuum sealer or adding a layer of parchment paper between each bite before transferring them to an airtight container; this will prevent them from sticking together.
Ingredients
Ingredients
Base Ingredients
- 2 cups plain yogurt
- 2 tablespoons honey (or maple syrup)
- 1 teaspoon vanilla extract
Fruits and Toppings
- 1 cup fresh fruit (e.g., berries, sliced bananas)
- Chopped nuts or granola (optional)
Note: Feel free to substitute ingredients based on your preferences!
Instructions
Instructions
Prepare the Yogurt Mixture
In a mixing bowl, combine the plain yogurt, honey, and vanilla extract. Stir everything together until smooth and well combined.
Add Fruits and Fill Molds
Gently fold in your choice of fresh fruit to the yogurt mixture. Spoon the mixture into silicone molds or mini cups, filling them about three-quarters full.
Freeze and Enjoy
Place the molds in the freezer for at least 4 hours or until completely firm. Once frozen, pop the yogurt bites out of the molds and store them in an airtight container in the freezer.
Enjoy your healthy and delicious snacks!
Pro Tips
- For a fun twist, try adding a dash of cocoa powder for chocolate yogurt bites or citrus zest for a refreshing zing.
Serving Suggestions
These Homemade Yogurt Bites can be an excellent addition to breakfast or snack time. Try serving them alongside a drizzle of honey or a sprinkle of cinnamon for extra flavor. They also work well as a topping for granola or oatmeal. If you're hosting a casual gathering, serve them in a colorful bowl and watch how they bring delight to both kids and adults alike.
You can also blend these yogurt bites into smoothies once they’re frozen. Simply toss a couple into your blender with some milk or juice for a creamy, nutritious beverage. This not only prevents waste but also enhances the smoothie’s protein content.
Dietary Variations and Customizations
If you're looking for a dairy-free alternative, you can easily substitute the yogurt with coconut yogurt or almond milk yogurt. Make sure to choose a variety that is thick enough to hold its shape upon freezing. For non-sweet options, replacing honey with a pinch of salt and adding savory herbs can yield a unique snack that pairs well with crackers and veggies.
For added nutrition, consider blending in a scoop of protein powder or chia seeds into the yogurt base before mixing in the fruits. This increases the overall health benefits without altering the flavor too much, making these bites even more satisfying and energizing.
Questions About Recipes
→ Can I use non-dairy yogurt for this recipe?
Yes, non-dairy yogurt works great! You can use coconut, almond, or soy yogurt as alternatives.
→ How long can I store these yogurt bites?
These yogurt bites can be stored in the freezer for up to 2 months.
→ Can I use frozen fruits?
Absolutely! Just make sure to thaw and drain the excess water before mixing them into the yogurt.
→ What can I use instead of honey?
Maple syrup or agave nectar make excellent substitutes for honey in this recipe.
Homemade Yogurt Bites
Created by: Josie Lambert
Recipe Type: Healthy Flavor Creations
Skill Level: Beginner
Final Quantity: 12 bites
What You'll Need
Base Ingredients
- 2 cups plain yogurt
- 2 tablespoons honey (or maple syrup)
- 1 teaspoon vanilla extract
Fruits and Toppings
- 1 cup fresh fruit (e.g., berries, sliced bananas)
- Chopped nuts or granola (optional)
How-To Steps
In a mixing bowl, combine the plain yogurt, honey, and vanilla extract. Stir everything together until smooth and well combined.
Gently fold in your choice of fresh fruit to the yogurt mixture. Spoon the mixture into silicone molds or mini cups, filling them about three-quarters full.
Place the molds in the freezer for at least 4 hours or until completely firm. Once frozen, pop the yogurt bites out of the molds and store them in an airtight container in the freezer.
Extra Tips
- For a fun twist, try adding a dash of cocoa powder for chocolate yogurt bites or citrus zest for a refreshing zing.
Nutritional Breakdown (Per Serving)
- Calories: 100 kcal
- Total Fat: 2g
- Saturated Fat: 1g
- Cholesterol: 5mg
- Sodium: 50mg
- Total Carbohydrates: 15g
- Dietary Fiber: 1g
- Sugars: 10g
- Protein: 5g